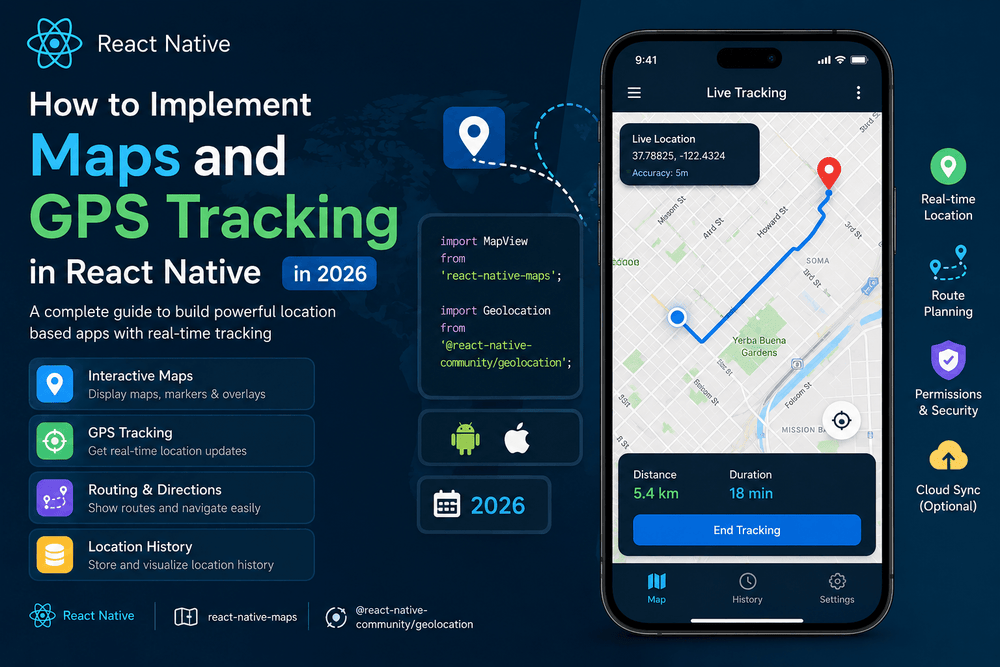
How to Implement Maps and GPS Tracking in React Native in 2026
Modern mobile applications frequently use maps and location services. Delivery platforms show drivers on a map, travel applications display destinations, fitness apps can record movement, and local services use GPS to help users find nearby places.
For React Native developers, adding location functionality can seem complicated at first. You need to display a map, request permission to access the device’s location, obtain GPS coordinates, update the interface, and potentially track movement while the user is moving.
Fortunately, React Native applications can integrate these features using established libraries and platform APIs.
In this guide, you will learn how to implement maps and GPS tracking in React Native, including map rendering, location permissions, retrieving coordinates, displaying markers, watching location changes, and designing a more reliable location-based application.
Why Add Maps and GPS Tracking to a React Native App?
Maps and GPS functionality can transform a simple application into a location-aware product.
Common examples include:
- Delivery tracking
- Ride-sharing applications
- Travel applications
- Navigation tools
- Fitness applications
- Restaurant discovery
- Real-estate applications
- Local business directories
- Field-service applications
- Event applications
A typical location-based application has several components:
React Native App
      ↓
Location Permission
      ↓
Device GPS
      ↓
Latitude + Longitude
      ↓
Map Interface
      ↓
Marker / User Location
      ↓
Optional Backend
Understanding this architecture is important before writing code.
A map and a GPS service are related, but they are not the same thing.
A map displays geographic information.
GPS/location services provide information about where the device is located.
What You Need Before Starting
There are several ways to implement maps and location services in React Native.
For this tutorial, we will use a common React Native approach involving:
- React Native
- Expo
react-native-mapsexpo-location
Expo provides location APIs through its Location package, while react-native-maps provides a React Native map component.
Before starting, make sure your development environment is configured and that you understand basic React Native concepts such as components, state, effects, and asynchronous functions.
Step 1: Install the Required Packages
If you are using an Expo project, install the required packages with:
npx expo install expo-location react-native-maps
Using expo install is useful because Expo can select package versions compatible with the project’s SDK.
For the latest compatibility information, always check the official Expo documentation and the react-native-maps documentation before deploying a production application.
Step 2: Import the Required Components
Create a screen for your map.
For example:
import { StyleSheet, View } from 'react-native';
import MapView, { Marker } from 'react-native-maps';
import * as Location from 'expo-location';
import { useEffect, useState } from 'react';
We will use:
MapViewto display the mapMarkerto display a locationexpo-locationto access device locationuseStateto store coordinatesuseEffectto request location information when the screen loads
Step 3: Request Location Permission
Mobile operating systems protect sensitive device capabilities such as location.
Your application should explicitly request permission before accessing the user’s location.
With Expo Location:
const { status } =
  await Location.requestForegroundPermissionsAsync();
You should then check whether the permission was granted:
if (status !== 'granted') {
  console.log('Location permission denied');
  return;
}
Expo’s official documentation provides APIs for requesting foreground and background location permissions and retrieving device coordinates.
Why Permission Handling Matters
Never assume that the user will grant location access.
They may:
- Allow access
- Deny access
- Grant access temporarily
- Change the permission later in system settings
Your application should provide a clear experience in each situation.
Step 4: Get the Current GPS Location
Once permission has been granted, you can request the device’s current position.
const location =
  await Location.getCurrentPositionAsync({});

console.log(location.coords.latitude);
console.log(location.coords.longitude);
The returned location contains coordinates and other information.
The two most important values for a basic map are:
latitude
longitude
For example:
Latitude: 30.4278
Longitude: -9.5981
These coordinates can be used to center the map on the user’s current position.
Step 5: Display the Map
Now create a simple map component.
<MapView
  style={styles.map}
  initialRegion={{
    latitude: 30.4278,
    longitude: -9.5981,
    latitudeDelta: 0.05,
    longitudeDelta: 0.05,
  }}
/>
The initialRegion defines the starting visible area.
A region generally includes:
- Latitude
- Longitude
- Latitude delta
- Longitude delta
The deltas control the approximate zoom level.
For a broader area, use larger delta values.
For a more detailed view, use smaller values.
Step 6: Center the Map on the User
Instead of hardcoding coordinates, use the GPS location.
You can maintain the location in React state:
const [location, setLocation] =
  useState<Location.LocationObject | null>(null);
Then load the location:
useEffect(() => {
  async function loadLocation() {
    const { status } =
      await Location.requestForegroundPermissionsAsync();

    if (status !== 'granted') {
      return;
    }

    const currentLocation =
      await Location.getCurrentPositionAsync({});

    setLocation(currentLocation);
  }

  loadLocation();
}, []);
Once the location is available, you can use it to configure the map.
Step 7: Add a Marker
Markers allow you to display a specific location on the map.
For example:
{location && (
  <Marker
    coordinate={{
      latitude: location.coords.latitude,
      longitude: location.coords.longitude,
    }}
    title="Your Location"
  />
)}
Now the application can display a marker at the device’s current coordinates.
This simple feature is the foundation for more advanced functionality.
You could later add:
- Multiple markers
- Custom marker icons
- Destination markers
- Delivery driver markers
- Restaurant locations
- User-generated locations
Step 8: Build a Complete Basic Map Screen
Here is a simplified example that combines the concepts:
import React, { useEffect, useState } from 'react';
import { StyleSheet, View } from 'react-native';
import MapView, { Marker } from 'react-native-maps';
import * as Location from 'expo-location';

export default function MapScreen() {
  const [location, setLocation] =
    useState<Location.LocationObject | null>(null);

  useEffect(() => {
    async function getLocation() {
      const { status } =
        await Location.requestForegroundPermissionsAsync();

      if (status !== 'granted') {
        return;
      }

      const currentLocation =
        await Location.getCurrentPositionAsync({});

      setLocation(currentLocation);
    }

    getLocation();
  }, []);

  return (
    <View style={styles.container}>
      <MapView
        style={styles.map}
        showsUserLocation={true}
        initialRegion={{
          latitude: 30.4278,
          longitude: -9.5981,
          latitudeDelta: 0.05,
          longitudeDelta: 0.05,
        }}
      >
        {location && (
          <Marker
            coordinate={{
              latitude: location.coords.latitude,
              longitude: location.coords.longitude,
            }}
            title="Your Location"
          />
        )}
      </MapView>
    </View>
  );
}

const styles = StyleSheet.create({
  container: {
    flex: 1,
  },
  map: {
    flex: 1,
  },
});
This is enough to create a basic location-aware React Native screen.
However, obtaining the current position once is not the same as GPS tracking.
Step 9: Implement Real-Time GPS Tracking
If your application needs to follow the user’s movement, you need to monitor location changes.
Expo Location provides watchPositionAsync() for receiving location updates while the application is active.
A simplified example is:
const subscription =
  await Location.watchPositionAsync(
    {
      accuracy: Location.Accuracy.High,
      distanceInterval: 10,
    },
    (newLocation) => {
      setLocation(newLocation);
    }
  );
The callback runs when a new location update is available.
The distanceInterval can help control how frequently updates occur based on movement.
This is important because requesting GPS updates excessively can consume additional battery and processing resources.
Step 10: Clean Up the Location Subscription
When using a location watcher inside React, clean it up when the component is removed.
For example:
useEffect(() => {
  let subscription:
    Location.LocationSubscription | null = null;

  async function startTracking() {
    const { status } =
      await Location.requestForegroundPermissionsAsync();

    if (status !== 'granted') {
      return;
    }

    subscription =
      await Location.watchPositionAsync(
        {
          accuracy: Location.Accuracy.High,
          distanceInterval: 10,
        },
        (newLocation) => {
          setLocation(newLocation);
        }
      );
  }

  startTracking();

  return () => {
    subscription?.remove();
  };
}, []);
This is an important React Native best practice.
Without proper cleanup, an application can accidentally maintain unnecessary subscriptions.
Foreground vs Background GPS Tracking
There is an important difference between foreground and background location tracking.
Foreground Tracking
The application is actively being used.
For example:
User opens delivery app
        ↓
Map screen is visible
        ↓
GPS tracking is active
This is generally simpler to implement.
Background Tracking
The application continues to receive location updates when it is not actively displayed.
For example:
User starts a trip
        ↓
Locks phone
        ↓
Application moves to background
        ↓
Location tracking continues
Background location introduces additional platform requirements, permissions, battery considerations, and configuration.
Expo provides separate APIs and configuration options for background location.
Do not request background location simply because it is technically available.
Only request it when the application’s core functionality genuinely requires it.
Battery Optimization for GPS Tracking
GPS tracking can consume significant battery depending on how frequently location updates are requested and the accuracy level selected.
You should carefully choose:
- Location accuracy
- Distance interval
- Time interval
- Foreground vs background tracking
- Frequency of server synchronization
For example, a fitness application may need frequent updates during an active workout.
A restaurant discovery application probably does not need continuous high-accuracy tracking.
This leads to an important principle:
Request the minimum location precision and frequency required by your application’s purpose.
Sending GPS Coordinates to a Backend
Many real-world applications do more than display the user’s location.
They send coordinates to a backend.
For example:
Mobile Device
     ↓
GPS Coordinates
     ↓
React Native App
     ↓
API
     ↓
Backend Database
     ↓
Other Users
A delivery application could use this architecture to allow customers to see the approximate location of a delivery vehicle.
You should avoid sending location updates unnecessarily.
Instead, define sensible update intervals based on the application’s purpose.
For example, a delivery tracking system might update location when the driver has moved a certain distance rather than sending a request every second.
Maps, GPS, and Privacy
Location data is sensitive information.
A professional application should clearly explain why location access is required.
Do not collect location simply because it is available.
Consider:
- Why do you need the location?
- How long should it be stored?
- Who can access it?
- Is it transmitted securely?
- Can the user stop tracking?
- Do you actually need historical location data?
You should also follow applicable privacy laws and platform policies.
For many applications, collecting less data is both safer and simpler.
Common React Native GPS Tracking Problems
Location Permission Is Denied
Always handle denied permissions gracefully.
Instead of leaving the user with a broken map, explain why location access is useful and provide an appropriate alternative where possible.
GPS Is Inaccurate
Location accuracy can vary depending on:
- Indoor environments
- Buildings
- Weather
- Device hardware
- Network conditions
- Available satellite signals
Never assume that GPS coordinates are perfectly accurate.
Tracking Consumes Too Much Battery
Reduce the update frequency or accuracy when high precision is not necessary.
Map Is Slow
Avoid rendering huge numbers of markers at the same time.
Also optimize custom marker components and other expensive map elements.
Location Updates Stop
Check application lifecycle behavior, permissions, operating system restrictions, and whether you are attempting foreground or background tracking.
Best Practices for React Native Maps and GPS
A reliable location-based application should follow several principles.
1. Request Permission at the Right Time
Explain the benefit before requesting access when appropriate.
2. Handle Permission Denial
The application should remain usable whenever possible.
3. Avoid Excessive GPS Updates
Frequent updates can affect battery life.
4. Clean Up Subscriptions
Always remove location watchers when they are no longer needed.
5. Protect Location Data
Treat location information as sensitive data.
6. Test on Physical Devices
GPS behavior cannot always be accurately evaluated using an emulator.
7. Handle Poor Connectivity
Location services and network connectivity are separate concerns.
A device may know its location even when it cannot communicate with your backend.
8. Test Different Environments
Test outdoors, indoors, with weak connectivity, and on different devices.
Recommended Architecture for a Location-Based React Native App
A scalable application might use a structure such as:
src/
├── components/
│   ├── Map/
│   └── LocationMarker/
│
├── hooks/
│   └── useLocation.ts
│
├── services/
│   ├── locationService.ts
│   └── apiService.ts
│
├── screens/
│   └── MapScreen.tsx
│
└── types/
    └── location.ts
A custom hook can keep location logic separate from the user interface.
For example:
function useLocation() {
  // Permission
  // Current location
  // Tracking
  // Cleanup

  return {
    location,
    loading,
    error,
  };
}
This makes your screens cleaner and makes location functionality easier to reuse.
Final Thoughts
Learning how to implement maps and GPS tracking in React Native opens the door to many useful mobile applications.
The basic process is straightforward:
Install map + location packages
          ↓
Request permission
          ↓
Get GPS coordinates
          ↓
Display MapView
          ↓
Add markers
          ↓
Watch location changes
          ↓
Optimize tracking
          ↓
Protect location data
The most important lesson is that GPS tracking is not simply about obtaining latitude and longitude.
A production-quality location feature needs thoughtful permission handling, battery optimization, error handling, lifecycle management, privacy considerations, and reliable testing.
For applications that only need to show a user’s current location, a simple foreground location implementation may be enough. Applications such as delivery platforms, fitness trackers, or navigation tools may require more advanced background tracking and backend synchronization.
Start with the simplest feature your application actually needs. Once the basic map and location functionality works reliably, gradually add markers, routes, tracking, server synchronization, and other advanced features.
By combining React Native with tools such as react-native-maps and Expo Location, developers can create powerful location-aware applications while maintaining a shared cross-platform codebase.
Frequently Asked Questions
Can React Native access GPS?
Yes. React Native applications can access device location through libraries and platform APIs. Expo provides the expo-location package for location permissions, current position, and location updates.
What is the best map library for React Native?
react-native-maps is one of the commonly used solutions for displaying maps in React Native applications. However, the best option depends on your project requirements, map provider, platform targets, and specific features.
How do I track a user’s location in React Native?
You can request location permission and use a location watcher such as Expo Location’s watchPositionAsync() for foreground tracking. Background tracking requires additional configuration and platform permissions.
Does GPS tracking drain the battery?
Continuous high-accuracy location tracking can increase battery consumption. Use the lowest practical accuracy and update frequency that meets your application’s requirements.
Can React Native track location in the background?
Yes, but background location requires additional permissions, configuration, and platform-specific considerations. It should only be used when background tracking is necessary for the application’s core functionality.
Should I store GPS history?
Only when your application genuinely requires it. Location history can be sensitive, so consider data minimization, secure storage, access control, retention periods, and applicable privacy requirements.
Trusted Sources
- Expo Location Documentation: https://docs.expo.dev/versions/latest/sdk/location/
- Expo Documentation: https://docs.expo.dev/
- React Native Official Documentation: https://reactnative.dev/
- React Native Maps Documentation: https://github.com/react-native-maps/react-native-maps
- Android Location Documentation: https://developer.android.com/develop/sensors-and-location/location
- Apple Core Location Documentation: https://developer.apple.com/documentation/corelocation
About The Author