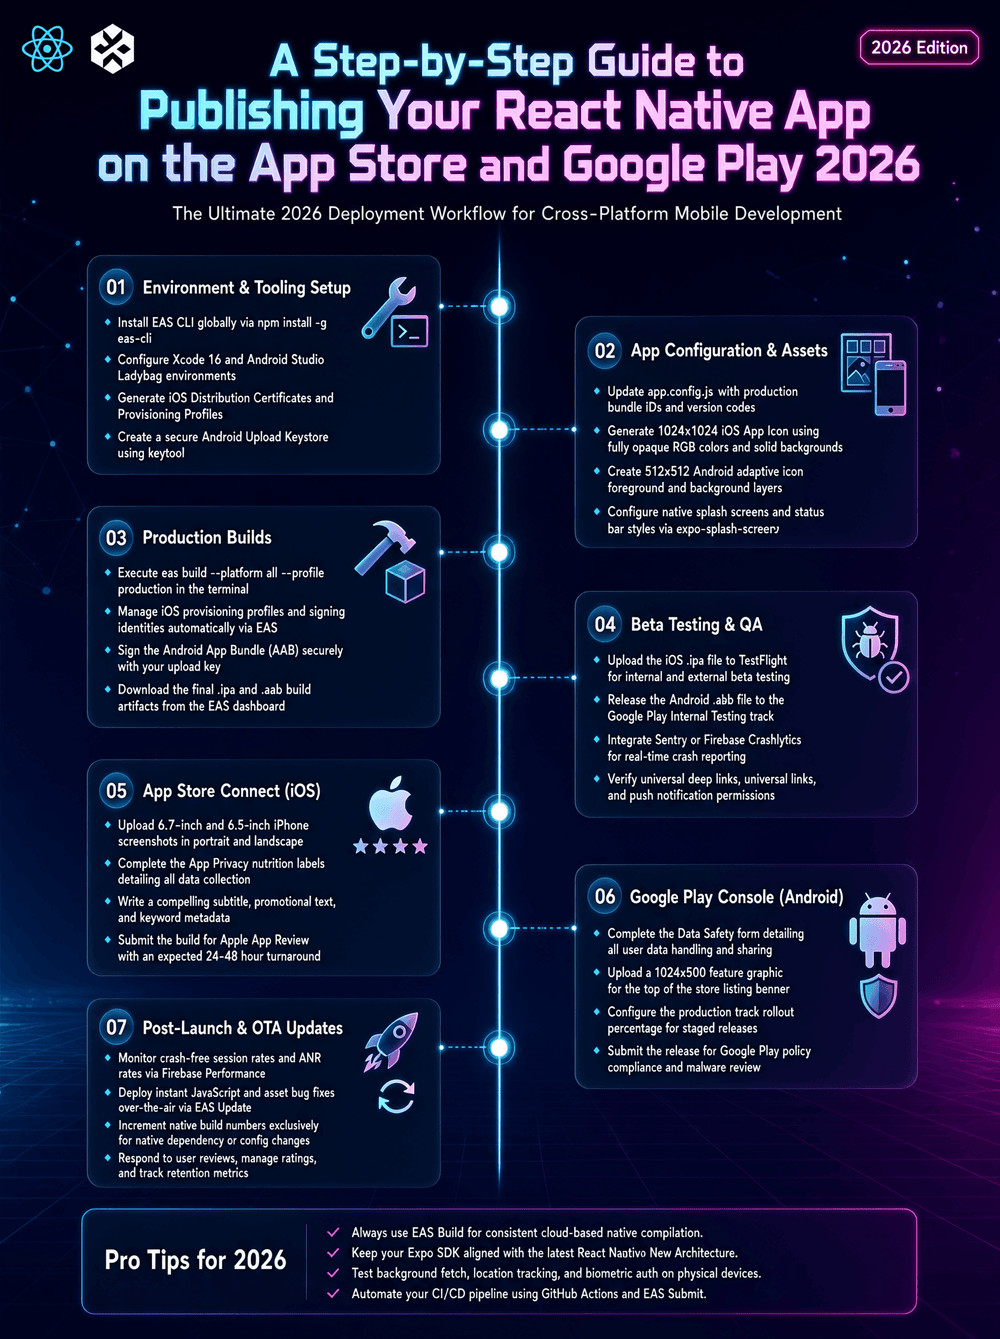
A Step-by-Step Guide to Publishing Your React Native App on the App Store and Google Play 2026
Publishing a React Native application is an exciting milestone for any developer. After spending weeks or months building features, fixing bugs, improving performance, and testing the user experience, the next challenge is making the app available to real users.
However, publishing a React Native app on the App Store and Google Play involves more than generating a production build. Developers must configure application identifiers, prepare store listings, create signing credentials, meet Apple and Google requirements, test production versions, and submit the application for review.
This step-by-step guide explains how to prepare and publish a React Native app for iOS and Android, with practical recommendations for developers who want a reliable and professional release process.
Why App Store and Google Play Preparation Matters
A technically functional application can still experience delays if its store configuration is incomplete.
Both Apple and Google require developers to provide information about the application, its functionality, privacy practices, screenshots, age or content classifications, and other metadata. Store requirements can also change over time, so developers should always consult the latest official documentation before submitting an application.
For React Native developers, the process is divided into two main release paths:
React Native → iOS production build → App Store Connect → Apple App Store
and
React Native → Android production build → Google Play Console → Google Play
Although the application shares much of its JavaScript or TypeScript code, iOS and Android still have separate native build, signing, and store requirements.
Step 1: Prepare Your React Native App for Production
Before thinking about the app stores, make sure your application is genuinely ready for production.
Development builds often contain debugging tools, test APIs, temporary credentials, verbose logging, or unfinished features. These should be reviewed before creating a release build.
Start by checking:
- Application name
- App icon
- Splash screen
- Application version
- API endpoints
- Environment variables
- Authentication
- Push notifications
- Deep links
- Analytics
- Error handling
- Network security
- Permissions
- Offline behavior
- Performance
You should also remove unnecessary console logs and development-only functionality where appropriate.
A useful practice is to create a production checklist and test every important user flow before submission.
For example, if your application requires user registration, test registration, login, password recovery, logout, and account deletion using the same production configuration that will be submitted to the stores.
Step 2: Configure the React Native Application Identifier
Every mobile application needs a unique identifier.
For Android, this is commonly represented by the application ID or package name.
For iOS, the equivalent is the bundle identifier.
For example:
com.example.myapp
The identifiers used by your project should match the applications registered in the corresponding developer portals.
Changing an identifier after publication can have significant consequences because app-store installations and updates depend on stable application identities.
Therefore, choose your production identifiers carefully before your first release.
Publishing a React Native App on Google Play
Step 3: Create a Google Play Developer Account
To distribute an Android application through Google Play, you need a Google Play developer account.
Google Play Console is the platform used to create applications, manage releases, configure store listings, complete policy declarations, and monitor published apps.
Google’s official documentation provides the current requirements and publishing workflow for developers. (support.google.com)
Once the developer account is ready, create your application in Play Console.
You will need to provide basic information such as:
- App name
- Default language
- Application type
- Free or paid status
- Contact information
- Store listing details
Keep your store information accurate and consistent with the actual application.
Step 4: Configure the Android Release Build
Modern Google Play distribution generally uses the Android App Bundle (AAB) format.
Instead of uploading a traditional APK as your primary Google Play release artifact, you normally generate a signed Android App Bundle.
A typical React Native Android release build can be generated with Gradle.
For example:
cd android
./gradlew bundleRelease
On Windows, you may use:
cd android
gradlew.bat bundleRelease
The generated .aab file can then be uploaded to Google Play Console.
Before generating the bundle, configure your release signing correctly.
Android applications distributed through Google Play need secure signing credentials. Protect your keystore and passwords carefully. Do not commit private signing credentials to a public Git repository.
Google provides official documentation explaining Android app signing, Play App Signing, and the release process. (developer.android.com)
Step 5: Set the Android Version Information
Your React Native Android project needs appropriate version information for the release.
The version code must increase when you publish a new version.
For example:
Version name: 1.0.0
Version code: 1
A future release might use:
Version name: 1.1.0
Version code: 2
The exact versioning strategy is up to your development team, but every uploaded Android release needs an appropriate increasing version code.
Version names are what users generally see, while version codes are used internally to distinguish releases.
Step 6: Complete Your Google Play Store Listing
A good store listing is more than an SEO exercise. It is the first impression users receive before installing your application.
Prepare:
- App title
- Short description
- Full description
- App icon
- Screenshots
- Feature graphic where applicable
- Category
- Contact information
- Privacy policy
- Content rating information
- Data safety information
Your description should accurately explain what your application does.
Avoid keyword stuffing or misleading claims. Search visibility matters, but misleading store metadata can damage user trust and may violate platform policies.
Google’s official Play Console documentation explains store listing requirements and app content declarations. (support.google.com)
Step 7: Complete Google Play Data Safety Information
If your application collects or shares user data, you must accurately declare relevant practices in Google Play’s Data safety section.
This can include information related to:
- Personal information
- Location
- Financial information
- App activity
- Device identifiers
- Diagnostics
- Other categories of data
Do not guess these answers.
Review the actual behavior of your application, SDKs, analytics systems, advertising services, authentication providers, and backend services.
Google states that developers are responsible for providing accurate information about their apps’ data collection and sharing practices. (support.google.com)
Step 8: Test Your Android Release
Before production, upload your application to an appropriate testing track.
Google Play supports testing options that allow developers to distribute pre-release builds before making an application broadly available.
Testing should include:
- Login and registration
- In-app purchases if applicable
- Push notifications
- Deep links
- Camera and microphone permissions
- Network failures
- Different screen sizes
- Dark mode
- Background behavior
- Application updates
- Account deletion
- Crash scenarios
A production build can behave differently from a development build, so testing the actual release artifact is essential.
Publishing a React Native App on the Apple App Store
Step 9: Join the Apple Developer Program
To distribute an iOS application through the App Store, you need an Apple Developer account with the appropriate program membership.
Apple provides the official enrollment and distribution documentation through the Apple Developer website. (developer.apple.com)
You will also use App Store Connect to manage the application, TestFlight builds, metadata, screenshots, pricing, availability, and submission process.
Step 10: Configure the iOS Bundle Identifier
Open your React Native project in Xcode and verify the application’s bundle identifier.
It should correspond to the App ID registered within your Apple developer account.
You should also review:
- Signing team
- Signing certificate
- Provisioning configuration
- Push notification capability
- Associated domains
- Background modes
- Required permissions
- Deployment target
The capabilities you enable should correspond to features that your application actually uses.
For example, do not request unnecessary permissions simply because they may become useful in the future.
Step 11: Configure iOS Permissions
Apple pays close attention to privacy and permission usage.
If your application accesses the camera, microphone, location, photo library, Bluetooth, contacts, or other protected resources, you need the appropriate permission configuration and user-facing explanation.
For example, an application using the camera should clearly explain why camera access is required.
Your permission descriptions should be understandable to ordinary users rather than written only for developers.
This is important for both user trust and App Store review.
Apple’s official documentation provides current information about privacy and permission-related requirements. (developer.apple.com)
Step 12: Prepare Your iOS Release Build
Open the iOS workspace in Xcode:
ios/MyApp.xcworkspace
Select the appropriate application target and configure it for distribution.
Before archiving, check the:
- Version
- Build number
- Bundle identifier
- Signing team
- Release configuration
- Deployment target
- App capabilities
Then select the appropriate physical device or generic iOS device destination and create an archive through Xcode.
The resulting archive can be uploaded to App Store Connect.
Apple provides official documentation for preparing and uploading builds through Xcode and App Store Connect. (developer.apple.com)
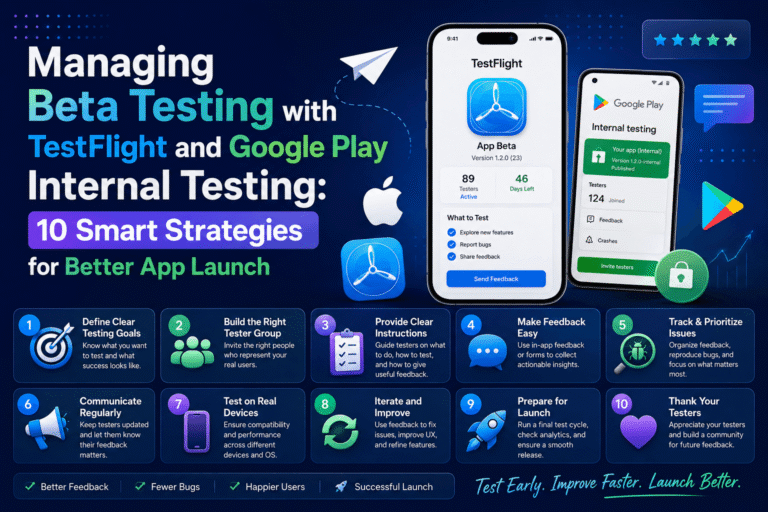
Step 13: Test With TestFlight
One of the most useful features of Apple’s publishing ecosystem is TestFlight.
TestFlight allows developers to distribute beta versions to testers before submitting the application for App Store review.
Use TestFlight to test:
- New user onboarding
- Authentication
- Push notifications
- Subscription flows
- Deep linking
- Offline behavior
- Performance
- Crash handling
- Device compatibility
Ask testers to report problems that may not appear during development.
Real users often discover usability issues that developers overlook because they already understand how the application is supposed to work.
Apple provides official TestFlight documentation for distributing beta builds and managing testers. (developer.apple.com)
Step 14: Create Your App Store Listing
In App Store Connect, prepare the information users will see on the App Store.
This generally includes:
- App name
- Subtitle
- Description
- Keywords
- Screenshots
- App icon
- Promotional information
- Category
- Age rating
- Support URL
- Privacy policy URL
Screenshots should represent the real application and demonstrate its most useful features.
Do not use misleading screenshots or descriptions that promise functionality the application does not provide.
Your App Store description should also be written for people rather than search engines. Use relevant keywords naturally and focus on explaining the application’s actual benefits.
Step 15: Complete Apple’s Privacy Information
Apple requires developers to provide privacy information for applications distributed through the App Store.
This information should accurately reflect how your application and third-party SDKs collect and use data.
Review your:
- Analytics SDKs
- Advertising SDKs
- Authentication providers
- Crash reporting services
- Payment services
- Social login systems
- Backend infrastructure
Apple’s privacy documentation explains the information developers need to provide about their applications’ data practices. (developer.apple.com)
Transparency is essential. Your privacy policy and App Store privacy disclosures should correspond to the application’s actual behavior.
Step 16: Submit Your React Native App for Review
Once your iOS or Android release is ready, submit it through the appropriate platform.
For Apple, the review process takes place through App Store Connect.
For Google Play, the release is managed through Play Console and may be subject to Google’s review and testing requirements.
Do not treat review as something that happens only at the end. Build your application with platform policies in mind from the beginning.
Common reasons for publishing delays include:
- Broken functionality
- Incomplete metadata
- Incorrect privacy information
- Missing account credentials for reviewers
- Inaccessible features
- Misleading descriptions
- Poor user experience
- Incorrect permission usage
- Policy-related problems
If reviewers need an account to access your application’s main functionality, provide appropriate review credentials and instructions where the platform requests them.
Step 17: Monitor Your Application After Release
Publishing is not the end of the development process.
Once users start installing your application, monitor:
- Crashes
- Performance
- Reviews
- Ratings
- Server errors
- Authentication failures
- Push notification delivery
- Subscription problems
- User feedback
A successful mobile application is continuously improved.
If version 1.0 has a serious bug, prepare a tested update rather than attempting to solve everything manually after publication.
It is also useful to establish a release cycle, such as:
Develop → Test → Beta → Review → Release → Monitor → Improve
This creates a predictable workflow for future React Native updates.
SEO and AdSense Best Practices for Your App Website
If you are publishing an article or tutorial about how to publish a React Native app, focus on original information and genuine value.
Avoid creating pages that exist primarily to attract search traffic.
Useful SEO practices include:
- Use a clear primary keyword.
- Create descriptive headings.
- Answer common developer questions.
- Use keywords naturally.
- Provide practical examples.
- Link to authoritative documentation.
- Keep information updated.
- Avoid keyword stuffing.
- Write for readers first.
For websites using Google AdSense, high-quality original content and a trustworthy user experience are particularly important. Google publishes policies and guidance for publishers, including requirements related to prohibited content and ad placement. (support.google.com)
Do not place advertisements in a way that tricks users into clicking them. Ads should remain clearly distinguishable from your site’s content and navigation.
React Native App Publishing Checklist
Before pressing the final release button, review the following:
- Production API configuration is correct
- App identifier is correct
- Version and build numbers are updated
- Android release signing is configured
- iOS signing is configured
- App icon is ready
- Screenshots are ready
- Privacy policy is published
- Data safety information is accurate
- App Store privacy information is accurate
- Required permissions are configured
- Production build has been tested
- Push notifications have been tested
- Deep links have been tested
- Authentication works correctly
- Critical crashes have been resolved
- Store descriptions are accurate
- Review instructions are available
- Customer support information is ready
Final Thoughts
Publishing a React Native app on the App Store and Google Play requires careful preparation, but the process becomes much easier when divided into clear stages.
Start by making your application production-ready. Then configure the Android and iOS identifiers, prepare signing credentials, create release builds, complete the store listings, provide accurate privacy information, test the production versions, and submit them for review.
The most important lesson is not to consider publishing as a single final step. App distribution is part of the complete mobile development lifecycle.
A well-prepared React Native application should be technically reliable, transparent about data practices, easy for users to understand, and compliant with the requirements of both platforms.
By following a structured React Native app publishing checklist, using official Apple and Google documentation, and testing your production builds carefully, you can reduce unnecessary submission problems and create a smoother path from development to a successful public release.
Frequently Asked Questions
How do I publish a React Native app on Google Play?
Generate a production Android App Bundle, configure secure signing, create your application in Google Play Console, complete the store listing and required declarations, test the release, and submit it through the appropriate Play Console release process.
How do I publish a React Native app on the App Store?
Create an Apple Developer account, configure the iOS project in Xcode, prepare signing and capabilities, create an archive, upload the build to App Store Connect, complete the application metadata and privacy information, test through TestFlight, and submit the application for Apple’s review.
Is React Native suitable for publishing production apps?
Yes. React Native is widely used for cross-platform mobile development. However, developers still need to manage native Android and iOS configuration, signing, permissions, store requirements, and platform-specific functionality.
Do I need separate builds for Android and iOS?
Yes. Although React Native allows you to share much of your application code, Android and iOS require their own native production builds and store submission processes.
What is the best format for a Google Play React Native release?
For modern Google Play distribution, the Android App Bundle (.aab) is the standard format used for publishing applications through Google Play. Android’s official documentation provides current guidance on app bundles and signing. (developer.android.com)
How can I avoid App Store and Google Play rejection?
Test the production application thoroughly, provide accurate metadata, follow privacy requirements, request only necessary permissions, ensure all important features work, and read the latest official Apple and Google publishing policies before submission.
Trusted Official Sources
The best source for current publishing requirements is always the platform owner because Apple and Google regularly update their policies, tools, and submission workflows.
Recommended sources include Apple Developer, App Store Connect Help, Google Play Console Help, and Android Developers. These official resources should be checked before every major release because requirements can change.
About The Author