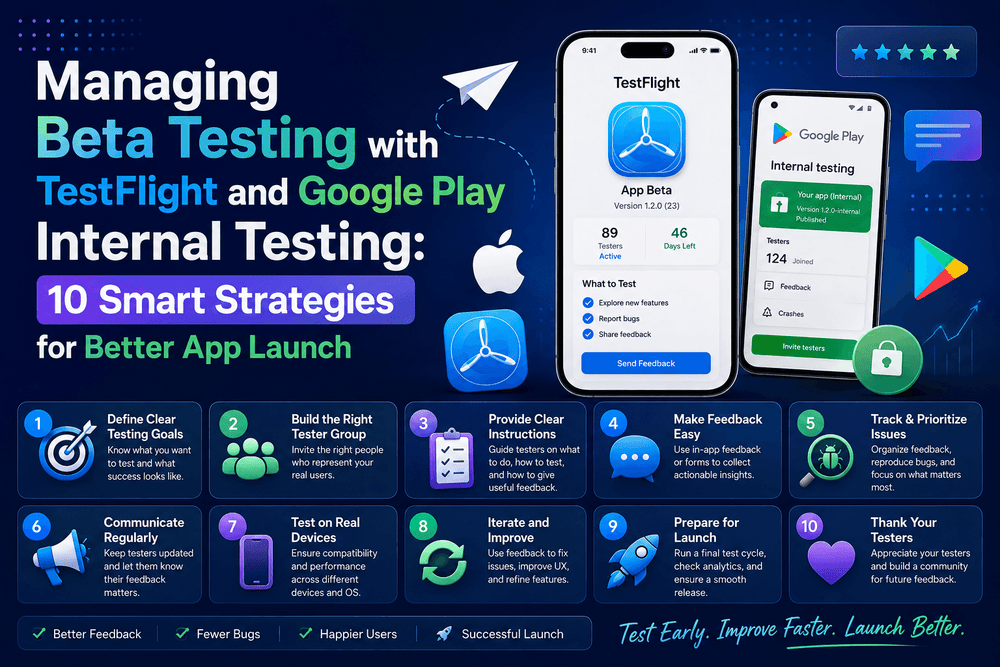
Managing Beta Testing with TestFlight and Google Play Internal Testin
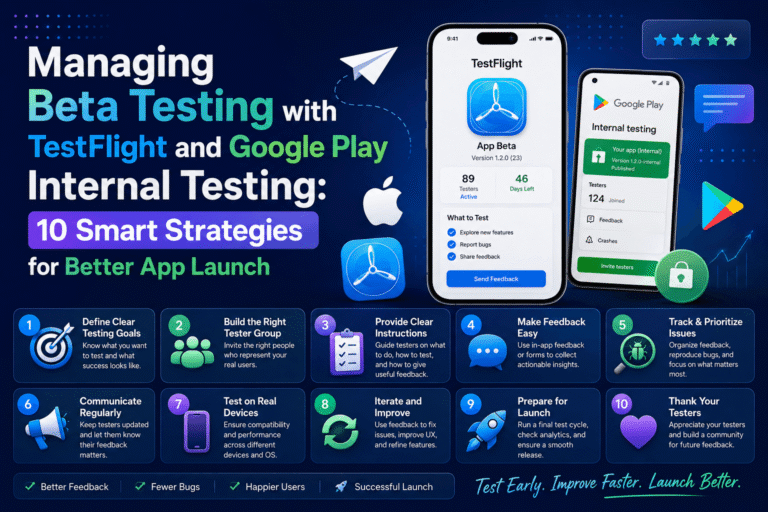
Managing Beta Testing with TestFlight and Google Play Internal Testing
Managing Beta Testing with TestFlight and Google Play Internal Testing is an important part of modern mobile app development. Before releasing an iOS or Android application to the public, developers need a practical way to test real-world behavior, identify bugs, understand usability problems, and collect feedback from people outside the development environment.
Apple provides TestFlight through App Store Connect for distributing beta builds and managing testers. Google Play Console provides several testing tracks, including Internal Testing, Closed Testing, and Open Testing. Google recommends starting with an internal test before expanding to a larger group of testers.
A successful beta program is more than sending a download link to friends. It requires planning, suitable testers, clear objectives, useful feedback channels, and a repeatable process for turning feedback into product improvements.
This guide explains how to manage beta testing effectively across iOS and Android while keeping the process organized, measurable, and focused on quality.
What Is Beta Testing?
Beta testing is the stage where a nearly complete application is tested by a selected group of users before a wider public launch.
Unlike internal development testing, beta testing provides feedback from people who may use the application differently from the development team.
A developer might understand exactly where a feature is located. A new tester may not.
That difference is valuable.
Beta testing can reveal:
- Usability problems
- Crashes
- Performance issues
- Confusing navigation
- Compatibility problems
- Login failures
- Network-related errors
- Missing features
- Accessibility problems
- Unexpected user behavior
The purpose is not simply to find bugs.
A strong beta program helps answer a larger question:
Is this application ready for real users?
Apple describes TestFlight as a way to distribute beta builds, manage beta testers, and collect feedback while continuing to improve the application before App Store submission.
Google Play provides a similar staged approach through its testing tracks.
Managing Beta Testing with TestFlight and Google Play
The most effective approach is to treat iOS and Android testing as two parts of one product-quality process.
The distribution tools are different, but the underlying workflow can remain similar:
Build → Distribute → Test → Collect Feedback → Fix → Retest → Release
For iOS, TestFlight allows developers to distribute beta builds through App Store Connect. Apple currently supports internal and external testers, with up to 100 internal testers who have appropriate App Store Connect access and up to 10,000 external testers per app. External testing may require beta App Review.
On Google Play, Internal Testing supports up to 100 selected testers per app. Google recommends starting with internal testing and then expanding to a small closed-testing group when appropriate.
This staged approach reduces risk.
Instead of exposing an unfinished application to thousands of people, you can start with a small group, fix major issues, and gradually expand the audience.
TestFlight vs Google Play Internal Testing
Although both platforms support pre-release testing, their workflows are not identical.
| Feature | Apple TestFlight | Google Play Internal Testing |
|---|---|---|
| Platform | iOS, iPadOS and other Apple platforms | Android |
| Main management system | App Store Connect | Google Play Console |
| Internal testers | Up to 100 App Store Connect users with access | Up to 100 testers |
| External/larger testing | Up to 10,000 external testers | Closed and Open testing tracks |
| Distribution | TestFlight | Google Play |
| Feedback | TestFlight feedback tools | Direct feedback channels and private feedback for applicable tracks |
| Main purpose | Beta distribution and feedback | Fast initial QA and controlled testing |
Google states that internal-test releases can become available to testers within minutes after publishing a new Android App Bundle, making the track useful for rapid quality checks.
TestFlight builds can be tested for up to 90 days, according to Apple’s current documentation.
The important point is that neither platform replaces good testing practices.
The tools distribute your software.
Your testing strategy determines what you learn from it.
1. Define Your Beta Testing Goals
Before inviting testers, define what you want to learn.
A vague objective such as “test the app” is difficult to measure.
Instead, create specific goals.
For example:
- Verify that onboarding is understandable.
- Test account creation.
- Identify crashes during normal usage.
- Measure whether users can complete a key task.
- Check performance on different devices.
- Validate a new subscription workflow.
- Test push notifications.
- Evaluate navigation.
- Discover confusing interface elements.
A focused beta test produces better feedback.
You can also divide testing into categories.
Technical testing
Focus on crashes, performance, compatibility, network conditions, and device behavior.
Usability testing
Focus on navigation, onboarding, readability, and whether users understand the interface.
Feature testing
Focus on newly introduced functionality.
Business testing
Focus on subscriptions, purchases, account flows, or other important product processes.
The more clearly you define the objective, the easier it becomes to determine whether the beta was successful.
2. Choose the Right Beta Testers
More testers do not automatically mean better testing.
A group of 20 relevant users can sometimes provide more useful information than hundreds of people who never use the application’s core features.
Choose testers who represent your intended audience.
Consider:
- Device types
- Operating-system versions
- Geographic locations
- Experience levels
- Usage patterns
- Network conditions
- Accessibility requirements
- Interest in the application’s main features
For example, if an application is designed for people who frequently travel, testing only with developers sitting on fast Wi-Fi may not reveal important real-world problems.
A diverse tester group can expose issues that a development team might never encounter.
3. Prepare a Stable Beta Build
Beta does not mean broken.
Testers should expect some imperfections, but the application should be stable enough to produce meaningful results.
Before distributing a build, perform a basic quality check.
Verify:
- The application launches correctly.
- Core features work.
- Authentication works.
- APIs are available.
- Test accounts function.
- Important screens load correctly.
- Notifications work when applicable.
- Analytics are configured correctly.
- The correct production-like environment is connected.
- There are no obvious blocking crashes.
For Android, Google Play’s internal testing track can be used even while some application setup is incomplete, provided a valid app bundle is available.
However, being able to distribute an incomplete app does not mean you should distribute a severely unstable one.
The objective is to create useful testing conditions.
4. Create Clear Testing Instructions
Do not simply send testers a download link and say:
“Please test the app.”
That creates inconsistent feedback.
Instead, give testers a short testing guide.
For example:
Test Task 1: Create an account.
Test Task 2: Complete onboarding.
Test Task 3: Find the main feature.
Test Task 4: Perform the primary action.
Test Task 5: Change a setting.
Test Task 6: Close and reopen the app.
Test Task 7: Report anything confusing or unexpected.
You can also ask testers to answer three simple questions:
- What worked well?
- What was confusing?
- What would you change?
This format encourages useful observations rather than vague comments.
5. Configure TestFlight Correctly
Apple’s TestFlight workflow begins with providing beta-test information, uploading a build, and then inviting internal or external testers. Developers can create tester groups and assign specific builds to those groups.
When preparing a TestFlight beta, provide useful information such as:
- Beta description
- Features to test
- Known limitations
- Feedback email or channel
- Required device or OS information
- Special instructions
For external testers, Apple notes that the first build added to an external testing group is sent to App Review to verify compliance with the App Review Guidelines.
That makes preparation important.
Do not wait until the beta is already distributed to discover that testers cannot access a critical feature.
6. Configure Google Play Internal Testing
Google Play Internal Testing is designed for fast, limited distribution.
According to Google, an internal test can support up to 100 testers per app. Testers can be added using email lists, and developers can provide a feedback URL or email address on the tester opt-in page.
A typical workflow is:
Play Console → Test and release → Testing → Internal testing
Then:
- Create the internal testing release.
- Upload the Android App Bundle.
- Create or select a tester list.
- Add testers.
- Provide a feedback channel.
- Publish the test.
- Share the opt-in or Play Store link.
- Monitor feedback.
- Upload improved builds.
Google recommends beginning with an internal test and then expanding to a small closed group when appropriate.
This approach works particularly well for development teams that want rapid iteration.
7. Collect and Organize Feedback
Feedback is useful only when it can be understood and acted upon.
Create a consistent structure for every report.
A useful bug report can contain:
Title: Login button does not respond
Device: Example Android device
OS: Android version
Build: Beta build number
Steps: Open login → enter credentials → tap Login
Expected result: Dashboard opens
Actual result: Nothing happens
Severity: High
This format helps developers reproduce problems quickly.
For usability feedback, encourage testers to describe what they expected to happen.
Instead of:
“The screen is confusing.”
A more useful report is:
“I expected the button to open my account settings, but I wasn’t sure whether it was clickable.”
That information can lead directly to a design improvement.
8. Track Bugs and Prioritize Fixes
Not every beta issue deserves immediate attention.
A useful prioritization system is:
Critical
Crashes, data loss, security problems, or completely blocked core functionality.
High
Major features do not work correctly for a significant portion of testers.
Medium
The feature works, but users encounter noticeable problems.
Low
Minor visual issues, wording problems, or small inconsistencies.
This prevents the team from spending hours fixing a tiny visual issue while an important crash remains unresolved.
You can also classify issues by frequency.
If one tester reports a problem once, investigate it.
If 15 testers independently report the same problem, it deserves much more attention.
9. Run Multiple Beta Testing Cycles
A single beta cycle is rarely enough for a complex application.
Instead, use several controlled rounds.
Beta Round 1: Core Functionality
Focus on crashes, login, navigation, and major features.
Beta Round 2: Usability
Focus on onboarding, interface clarity, navigation, and user experience.
Beta Round 3: Compatibility
Test different devices, screen sizes, operating-system versions, and network environments.
Beta Round 4: Release Candidate
Test the build that is closest to the intended production release.
This approach gives each testing phase a clear purpose.
It also prevents the team from trying to solve every possible problem at the same time.
10. Measure Beta Testing Success
A beta program should have measurable outcomes.
Useful metrics include:
- Number of active testers
- Tester participation rate
- Number of crashes
- Crash-free sessions
- Number of bugs reported
- Number of critical bugs
- Average time to resolve bugs
- Feature completion rate
- Tester retention
- Feedback volume
- Most frequently reported problems
You can also measure task success.
For example:
Task: Complete account registration.
Testers: 30
Successful completions: 27
Success rate: 90%
This tells you much more than simply knowing that 30 people installed the app.
Installation is not the same as successful testing.
Common Beta Testing Mistakes
Even experienced teams can make beta testing unnecessarily difficult.
Mistake 1: Choosing testers randomly
A large but irrelevant audience can generate noisy feedback.
Mistake 2: Testing only the newest feature
Existing features can break when new code is introduced.
Mistake 3: Ignoring older devices
Real users may have devices that developers do not use every day.
Mistake 4: Asking for vague feedback
“Tell us what you think” is less useful than asking specific questions.
Mistake 5: Ignoring repeated complaints
When multiple testers report the same issue, investigate it carefully.
Mistake 6: Changing too many things at once
If every build introduces major changes, it becomes difficult to determine which change caused a new problem.
Mistake 7: Ending testing too early
A short beta can miss problems that appear only after repeated usage.
Mistake 8: Forgetting the production environment
A beta can work perfectly against a test server and fail when connected to production infrastructure.
Best Practices for Managing Beta Testing with TestFlight and Google Play
A reliable beta program usually follows a few simple principles.
Keep builds identifiable
Use clear version and build numbers.
Maintain release notes
Tell testers what changed in every version.
Keep feedback centralized
Avoid collecting half the reports through email, another portion through chat, and the rest through random messages.
Respond to testers
People are more likely to provide useful feedback when they know their reports are being reviewed.
Protect tester privacy
Only collect information that is necessary for the testing process and handle tester data responsibly.
Test both platforms consistently
If your application is available on iOS and Android, use comparable testing objectives across both platforms.
The implementation can differ, but the quality standards should remain consistent.
Final Beta Testing Checklist
- Define clear beta testing objectives.
- Identify your target tester profile.
- Prepare a stable beta build.
- Test critical functionality internally.
- Configure TestFlight for iOS.
- Configure Google Play Internal Testing for Android.
- Create appropriate tester groups.
- Provide clear testing instructions.
- Establish a feedback channel.
- Record device and OS information.
- Track build numbers.
- Categorize bugs by severity.
- Prioritize critical problems.
- Test new fixes with a new build.
- Run multiple testing cycles when necessary.
- Monitor crash and stability data.
- Compare feedback across platforms.
- Perform final regression testing.
- Confirm the release candidate is ready.
- Review the latest Apple and Google documentation before production release.
Image and Media Suggestions
Featured Image
Concept: A modern mobile developer dashboard showing iOS TestFlight and Google Play testing workflows, with testers, smartphones, bug reports, and a release checklist.
Alt Text: Managing Beta Testing with TestFlight and Google Play Internal Testing
Supporting Image
Concept: A side-by-side visual comparison of Apple TestFlight and Google Play Internal Testing, showing testers, builds, feedback, and release stages.
Alt Text: TestFlight and Google Play Internal Testing beta workflow
Video Suggestion
Create a short tutorial demonstrating the complete beta workflow:
Build → Upload → Add Testers → Distribute → Collect Feedback → Fix Bugs → Release
A practical screen-recording tutorial can be more valuable than a generic promotional video because readers can see the actual testing process.
Internal Linking Strategy
To strengthen the SEO structure of your website, connect this article to relevant mobile-development articles using natural anchor text.
Recommended internal links include:
- App Store Review Guidelines
- App Store Optimization Strategies
- Setting Up Push Notifications for iOS and Android in React Native
- React Native Performance Optimization
- How to Secure User Data and Store Credentials Safely on Android
- Building Your First React Native App with Expo
Only link to articles that actually exist on your website.
Avoid adding irrelevant internal links simply to increase link count.
Trusted Official Sources
For accurate and current platform requirements, use the official documentation from Apple and Google.
Apple TestFlight: Apple explains that TestFlight is used to distribute beta builds, manage testers, and collect feedback before submitting an app for review.
Apple External Testers: Apple documents the current external-testing limits and invitation process.
Apple: Invite External Testers
Google Play Testing: Google’s official documentation explains Internal, Closed, and Open testing and recommends starting with internal testing before expanding when appropriate.
Google Play: Set Up an Internal, Closed, or Open Test
Google Play Release Management: Google also documents how developers create and roll out releases across testing tracks and production.
Google Play: Prepare and Roll Out a Release
Conclusion
Managing Beta Testing with TestFlight and Google Play Internal Testing gives mobile development teams a structured way to discover problems before they reach a larger audience.
The strongest strategy is to begin with a small group, test the most important workflows, collect structured feedback, fix critical issues, and gradually expand testing.
TestFlight provides Apple’s beta distribution and feedback workflow, while Google Play Internal Testing provides a fast and controlled way to distribute Android builds to up to 100 selected testers.
However, the platforms themselves are only part of the solution.
The real value comes from how you manage the testing process.
Define clear objectives, select relevant testers, document every build, organize feedback, prioritize problems, and repeat the cycle until the application reaches an appropriate level of quality.
A thoughtful beta program does more than prevent bugs. It helps developers understand how real people interact with their products.
That insight can improve usability, reliability, performance, and ultimately the quality of the final app.
About The Author