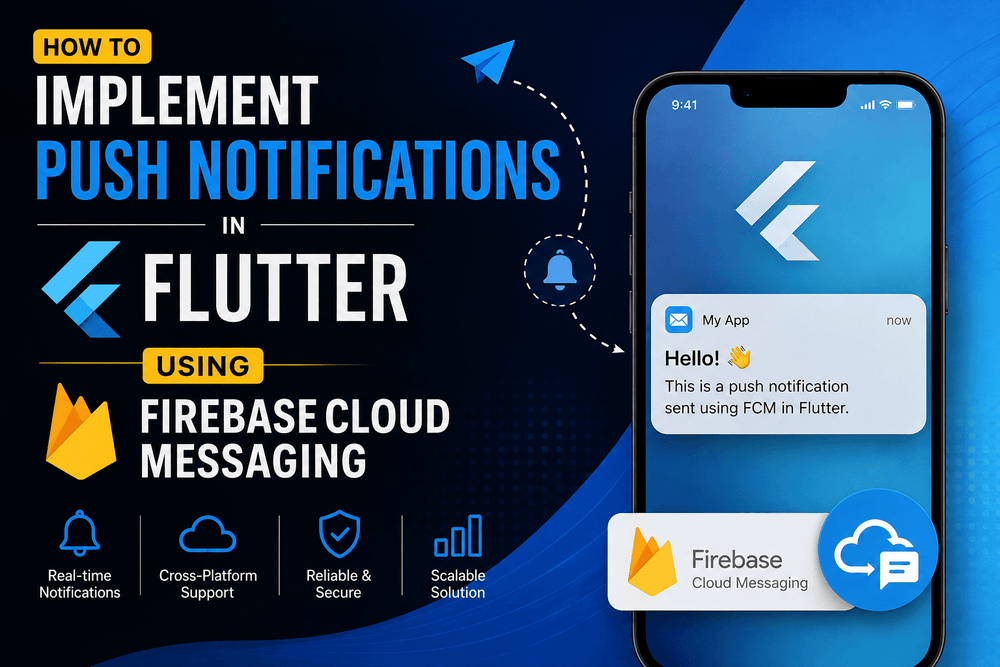
How to Implement Push Notifications in Flutter Using Firebase Cloud Messaging
Push notifications are an important feature for modern mobile applications. They allow an app to inform users about new messages, updates, reminders, promotions, important events, or other relevant information even when the application is not actively being used.
For Flutter developers, one of the most practical solutions for implementing push notifications is Firebase Cloud Messaging (FCM). FCM is a cross-platform messaging service that can deliver notification and data messages to Android, iOS, web, and other supported platforms.
In this guide, you will learn how to implement push notifications in Flutter using Firebase Cloud Messaging from the initial Firebase configuration to receiving notifications, handling background messages, and responding when a user taps a notification.
What Is Firebase Cloud Messaging?
Firebase Cloud Messaging, commonly called FCM, is a messaging service provided by Google Firebase. It allows developers to send messages from a server or Firebase environment to applications running on supported devices.
FCM supports both notification messages and data messages. Notification messages can be displayed to users, while data messages allow the application to decide how the received information should be processed. Firebase also supports targeting individual devices, groups of devices, and topic subscribers.
This makes Firebase Cloud Messaging a useful option for Flutter applications that need reliable push notification functionality.
Why Use FCM for Flutter Push Notifications?
There are several reasons why developers choose Firebase Cloud Messaging for Flutter applications:
- Cross-platform messaging support
- Integration with Firebase services
- Device token management
- Topic-based messaging
- Notification and data payloads
- Background message handling
- Support for Android and iOS
- Integration with Firebase Console
- Server-side messaging capabilities
Instead of creating a completely different notification system for Android and iOS, Flutter developers can use the firebase_messaging package to communicate with FCM from the application.
Prerequisites
Before implementing Firebase Cloud Messaging in Flutter, make sure you have:
- A Flutter development environment
- A Flutter project
- An Android or iOS test device
- A Firebase project
- Basic knowledge of Dart and Flutter
- The Firebase CLI or FlutterFire CLI configured if required
It is also recommended to test push notifications on a physical device because notification behavior can differ between emulators, simulators, and real devices.
Step 1: Create a Firebase Project
The first step is to create or select a project in Firebase.
Open the official Firebase website and create a new Firebase project. After creating the project, add your Android and/or iOS application.
For Android, Firebase uses your application’s package name to identify the application. For iOS, you need to provide the appropriate Bundle ID.
Firebase provides platform-specific setup instructions for Flutter applications, including additional configuration required by iOS.
Once your application is registered, download or configure the required Firebase configuration files according to the official setup instructions.
Step 2: Add Firebase Messaging to Your Flutter Project
The main Flutter package used for Firebase push notifications is:
flutter pub add firebase_core
flutter pub add firebase_messaging
Then retrieve the latest dependencies:
flutter pub get
The firebase_core package initializes Firebase, while firebase_messaging provides access to Firebase Cloud Messaging functionality inside your Flutter application.
Using the FlutterFire packages is preferable to manually implementing platform-specific Firebase messaging logic because the packages provide a Flutter-friendly API.
Step 3: Initialize Firebase
Before using Firebase Messaging, Firebase should be initialized.
A typical main.dart setup looks like this:
import 'package:firebase_core/firebase_core.dart';
import 'package:flutter/material.dart';

<code>import 'firebase_options.dart';

Future<void> main() async {
  WidgetsFlutterBinding.ensureInitialized();

  await Firebase.initializeApp(
    options: DefaultFirebaseOptions.currentPlatform,
  );

  runApp(const MyApp());
}

class MyApp extends StatelessWidget {
  const MyApp({super.key});

  @override
  Widget build(BuildContext context) {
    return MaterialApp(
      title: 'Flutter Notifications',
      home: const HomePage(),
    );
  }
}
</code>Step 4: Request Notification Permission
Permission handling is particularly important for modern mobile operating systems.
According to Firebase documentation, notification permission must be requested on iOS, macOS, web, and Android 13 or newer before notification payloads can be received as expected.
You can request permission with FirebaseMessaging:
import 'package:firebase_messaging/firebase_messaging.dart';

Future<void> requestNotificationPermission() async {
  FirebaseMessaging messaging = FirebaseMessaging.instance;

  NotificationSettings settings = await messaging.requestPermission(
    alert: true,
    badge: true,
    sound: true,
  );

  print(
    'Notification permission status: '
    '${settings.authorizationStatus}',
  );
}
You can call this function after Firebase initialization.
It is good practice to explain to users why notifications are useful before requesting permission, especially if notifications are an important part of your application’s functionality.
Step 5: Get the FCM Device Token
Each registered application instance can receive an FCM registration token. This token can be used by your server to target a particular application instance.
You can retrieve the token using:
Future<void> getFCMToken() async {
  final FirebaseMessaging messaging =
      FirebaseMessaging.instance;

  final String? token = await messaging.getToken();

  print('FCM Token: $token');
}
For production applications, avoid treating the token as a permanent value. Your application should also listen for token changes:
FirebaseMessaging.instance.onTokenRefresh.listen(
  (String token) {
    print('New FCM token: $token');

    // Send the updated token to your backend.
  },
);
If your application has a backend, storing the current token on the server can allow you to send targeted notifications to the appropriate user or device.
Step 6: Handle Foreground Notifications
When a Flutter application is open and being actively used, incoming messages can be received through the onMessage stream.
For example:
FirebaseMessaging.onMessage.listen(
  (RemoteMessage message) {
    print('Received a foreground message');

    print('Message ID: ${message.messageId}');
    print('Data: ${message.data}');

    if (message.notification != null) {
      print(
        'Title: ${message.notification?.title}',
      );

      print(
        'Body: ${message.notification?.body}',
      );
    }
  },
);
Firebase notes that notification messages received while the application is in the foreground do not automatically display a visible notification by default on Android and iOS. Developers can implement the desired foreground presentation behavior separately.
This distinction is important because many developers test FCM while the application is open and assume that the notification failed when the message was actually received successfully.
Step 7: Handle Background Messages
Your application may also need to process messages while it is running in the background.
Firebase provides onBackgroundMessage for this purpose.
A background handler should be defined as a top-level function:
@pragma('vm:entry-point')
Future<void> firebaseMessagingBackgroundHandler(
  RemoteMessage message,
) async {
  await Firebase.initializeApp();

  print(
    'Background message received: '
    '${message.messageId}',
  );

  print('Data: ${message.data}');
}
Then register the handler before starting the application:
Future<void> main() async {
  WidgetsFlutterBinding.ensureInitialized();

  await Firebase.initializeApp(
    options: DefaultFirebaseOptions.currentPlatform,
  );

  FirebaseMessaging.onBackgroundMessage(
    firebaseMessagingBackgroundHandler,
  );

  runApp(const MyApp());
}
For Flutter 3.3.0 and later, Firebase documentation recommends using the @pragma('vm:entry-point') annotation so the background handler is not removed during release-mode tree shaking. The handler must also be a top-level function rather than an anonymous function or an instance method.
Background handlers should perform their work efficiently. Long-running operations can affect performance and may be terminated by the operating system.
Step 8: Handle Notification Taps
Receiving a notification is only part of the user experience. You may also want to know when a user taps a notification and then navigate to a particular screen.
For example, imagine your application sends a notification about a new article. When the user taps the notification, you could open the article page.
Firebase Messaging provides two important mechanisms for notification interactions:
getInitialMessage()for notifications that opened the application from a terminated stateonMessageOpenedAppfor notifications tapped while the application was in the background
A basic implementation can look like this:
Future<void> setupNotificationInteractions() async {
  final RemoteMessage? initialMessage =
      await FirebaseMessaging.instance.getInitialMessage();

  if (initialMessage != null) {
    handleNotificationMessage(initialMessage);
  }

  FirebaseMessaging.onMessageOpenedApp.listen(
    handleNotificationMessage,
  );
}

void handleNotificationMessage(RemoteMessage message) {
  final String? type = message.data['type'];

  if (type == 'article') {
    print('Open article from notification');
  }
}
Firebase’s official Flutter documentation recommends these APIs for handling notification interactions and determining what action should occur after the user opens a notification.
Notification Messages vs Data Messages
One of the most important concepts when working with FCM is understanding the difference between notification messages and data messages.
Notification Messages
Notification messages contain information intended to be presented to the user, such as:
Title: New Article
Body: A new article is available.
They are useful for straightforward user notifications.
Data Messages
Data messages contain custom key-value information that your application can process.
For example:
{
  "type": "article",
  "articleId": "12345"
}
Your Flutter application can inspect this information and decide what action to perform.
FCM supports both notification and data messages, allowing developers to choose between simple notification delivery and application-controlled behavior.
Common Problems With Flutter Firebase Notifications
Even with correct code, push notifications can sometimes appear not to work. Here are several common causes.
1. Permission Was Not Granted
On supported platforms, the user must grant notification permission. Always check the returned authorization status.
2. The Application Was Force-Stopped
Firebase explains that Android applications force-stopped through device settings may need to be opened again before background messaging resumes. Similar restrictions can apply on iOS when an application is manually removed from the app switcher.
3. Testing Only in the Foreground
Foreground notification behavior differs from background behavior. A message can be successfully received through onMessage without automatically appearing as a system notification.
4. Incorrect Firebase Configuration
Verify that your Android package name or iOS Bundle ID matches the application registered in Firebase.
5. iOS Configuration Is Incomplete
For iOS, push notification capabilities and background modes need to be configured in Xcode. Firebase also requires the appropriate Apple Push Notification service credentials to be configured.
Best Practices for Push Notifications in Flutter
Implementing Firebase Cloud Messaging is only the technical part. A good notification strategy also considers the user’s experience.
Send Relevant Notifications
Avoid sending notifications simply because you can. Notifications should provide useful information and have a clear purpose.
Use Clear Titles
A short and descriptive title helps users understand why the notification matters.
Use Notification Data Carefully
When using custom data, keep your payload structure consistent so that your Flutter application can process it reliably.
Handle Token Updates
FCM registration tokens can change. Keep your backend synchronized with the latest token.
Test Different Application States
Test notifications when the application is:
- Open
- In the background
- Completely terminated
- Running on different supported Android versions
- Running on iOS when applicable
Firebase explicitly documents different message-handling behavior depending on the application’s state, so testing only one scenario is not enough.
Avoid Overusing Push Notifications
Too many notifications can frustrate users and may lead them to disable notifications entirely. A thoughtful notification strategy is usually better than sending frequent messages.
Frequently Asked Questions
Is Firebase Cloud Messaging free for Flutter push notifications?
FCM is a Firebase messaging service that can be integrated into Flutter applications. However, the overall cost of a production application can depend on other Firebase services and infrastructure you use. Always check the current Firebase pricing and service limits for your specific architecture.
Can Flutter receive notifications when the app is closed?
Flutter applications can receive and process supported FCM messages when they are not actively displayed, but the exact behavior depends on the message type, operating system, application state, and platform restrictions. Firebase documents these differences for Android, iOS, and web.
Can I send notifications to a specific user?
Yes. A common architecture is to associate an FCM registration token with a user account on your backend and use an appropriate server-side messaging solution to target that device.
Can I send notifications to groups of users?
Yes. FCM supports different targeting approaches, including topics. Topics can be useful when many users need to receive the same type of message, such as notifications about a particular category or feature.
Do I need a backend server?
Not necessarily for every use case. You can test notifications using Firebase tools, but production applications that need automated, personalized, or event-driven notifications commonly use a secure backend or server environment to send messages.
Final Thoughts
Implementing push notifications in Flutter using Firebase Cloud Messaging is a practical way to add real-time communication between your application and its users. The firebase_messaging package provides Flutter developers with APIs for permissions, FCM tokens, foreground messages, background processing, and notification interactions.
The most important part is not simply getting a notification to appear. A reliable implementation should account for different application states, platform-specific permission requirements, token changes, notification interactions, and the overall user experience.
If you are building a Flutter application that depends on timely updates, messages, reminders, or user engagement, Firebase Cloud Messaging provides a strong foundation for implementing push notifications across supported platforms.
Always verify implementation details against the latest official Firebase and FlutterFire documentation because platform requirements and SDK behavior can change over time.
Official Sources and Documentation
- Firebase Cloud Messaging documentation
- Firebase Cloud Messaging for Flutter
- Firebase Flutter setup documentation
- Firebase message receiving and notification interaction documentation
Firebase Cloud Messaging Documentation
Firebase Cloud Messaging for Flutter – Get Started
Firebase Cloud Messaging for Flutter – Receive Messages
About The Author